Configuring and Securing VPC – Virtual Private Cloud in AWS
A Virtual Private Cloud (VPC) is a private network environment within a public cloud infrastructure. It provides the functionality to manage and control network settings, such as IP address ranges, subnets, route tables, and network gateways, allowing you to securely run your resources in a logically isolated section of the cloud provider’s data center.
Lets start Creating VPC and securing it.
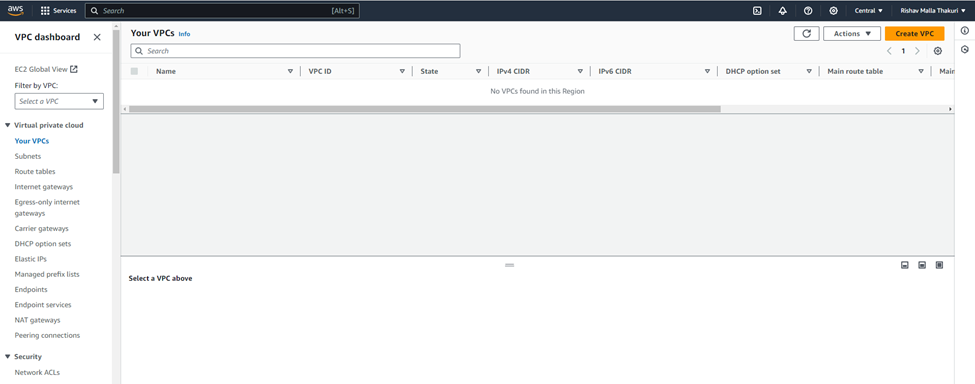
Just go to the search for the VPC and Click on it.

Here, select Your VPCs and then click on Create VPC.
Select the VPC only from the option and give IPV4 CIDR as 10.0.0.0/24 and leave other option as default.


1) Creating Public and Private VPC
So we can create Subnets for the VPC. Just go to Left menu and select subnets.

Creating Public Subnet
Here we are creating Public Subnet having IPV4 subnet CIDRs of 10.0.1.0/24

Creating Private Subnet
Here we are creating Public Subnet having IPV4 subnet CIDRs of 10.0.2.0/24

List of Subnets

Our Infrastructure will now look like this:

Now we have our VPC and subnets, and in particular, our Public_Subnet created, we can create and attach an IGW.
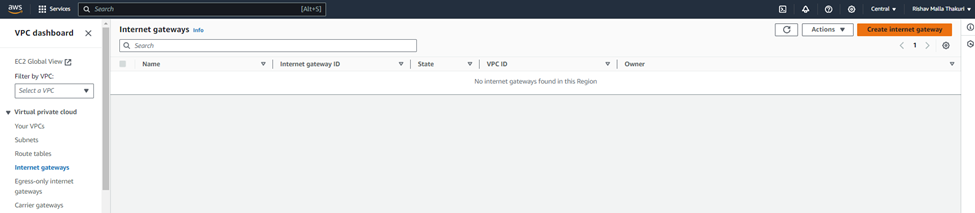
2) Creating an IGW ( Internet Gateway)
Here we will be creating Internet Gateway by choosing Internet Gateway from the left hand side of the menu. And then click on Create Internet Gateway.
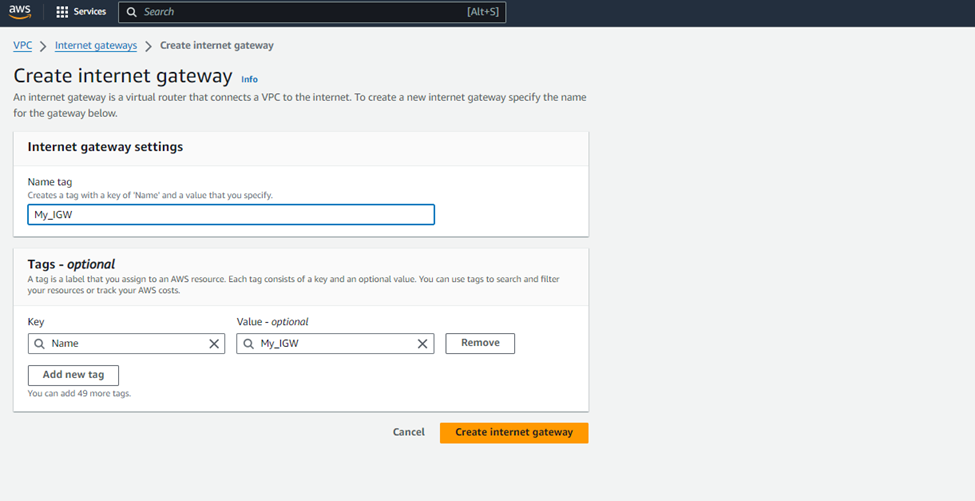
Give a name to Internet Gateway and create internet gateway.

Now, as if the IGW was created. Select the created IGW and then Attach to VPC.

Select the newly created VPC form the drop-down list and attach the VPC.

Here, we can see the VPC is attached to the IGW.

Currently, no subnets have routes directed to the Internet Gateway (IGW) for internet access. We will create a new route table that includes a route to the internet through IGW. Afterward, this route table will be linked to our Public_Subnet.

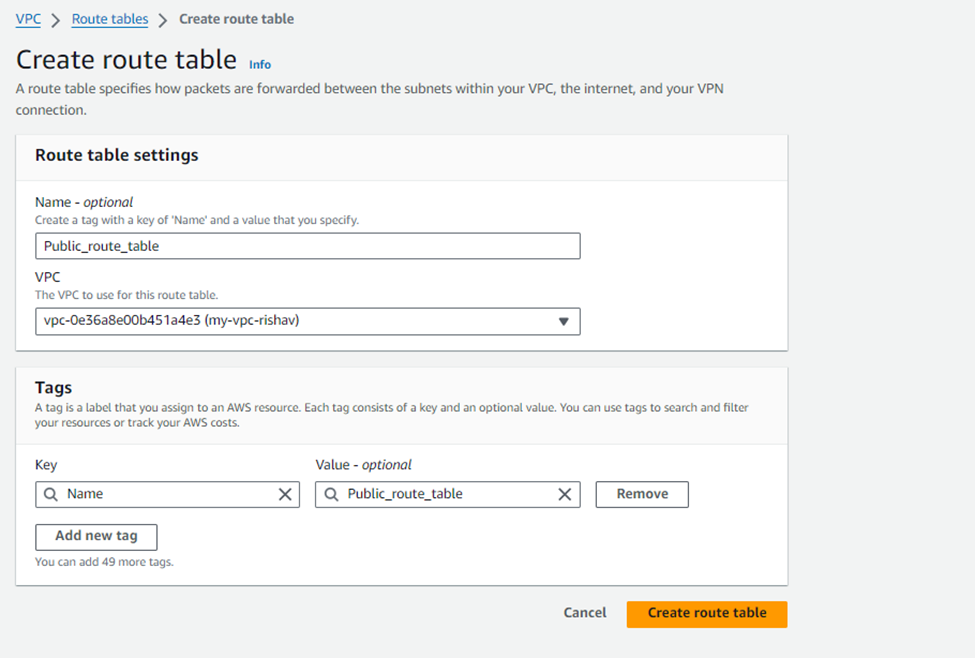
3) Creating a route table
We need to create a route table to direct our subnets on how and where to route specific types of traffic.
Giving the name of the Route table, as the route is for Public subnet, we named it as Public_route_table.
Go to the Routes tab, and we will see only one route present – the default local route that is included in all route tables, allowing communication between all subnets.

Now, click on the Edit routes in order tot add the routes. Lets add the configuration as, click on the add route, then enter the Destination as 0.0.0.0/0 and for Target select Internet Gateway and then select the IGW we just created.
Go to the Routes tab, and you will see only one route present – the default local route that is included in all route tables, allowing communication between all subnets. This route directs all traffic without a specified route to the IGW, which will then send it to the internet. After setting this, click Save routes.

Now. Select the subnet Associations Tab and click on Edit subnet associations. Here we can see the this route table does not have any subnet associations.

Now, select the Public_Subnet and select Save.

Public_Subnet is now linked to Public_Route_Table. This association enables Public_Subnet to route internet traffic through the IGW, as specified in Public_Route_Table.
As of Now, our Infrastructure will look like this:
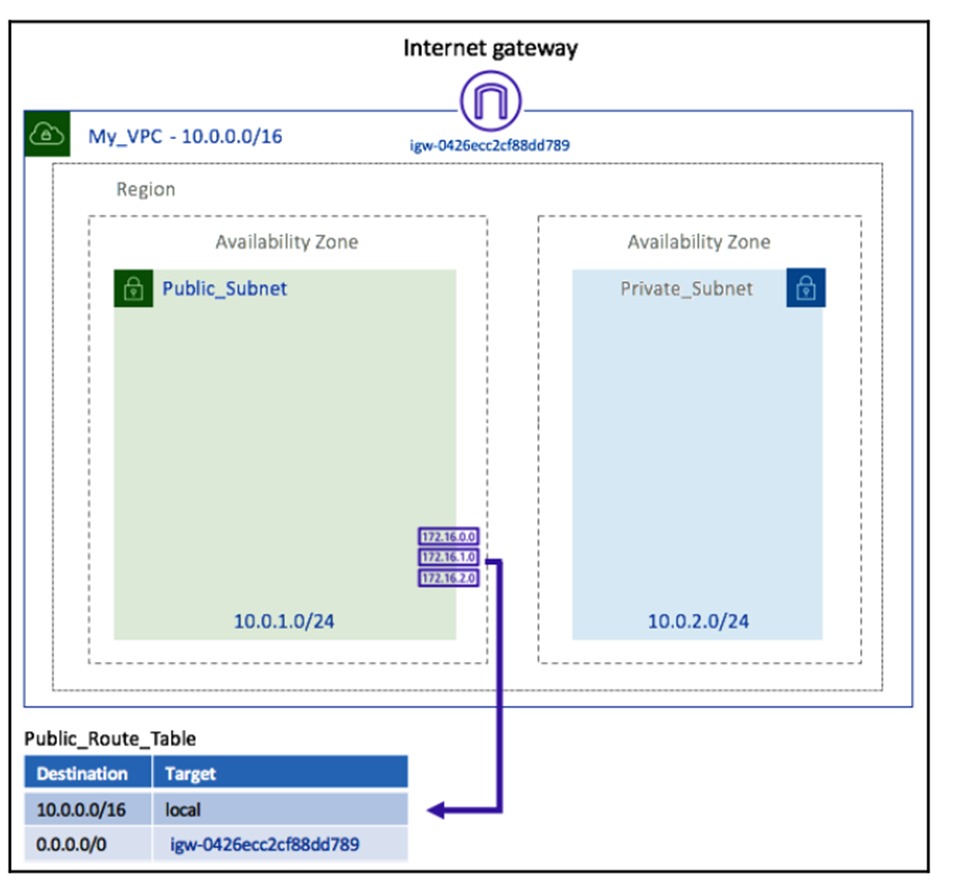
We now have an IGW connected to the VPC and a new route table linked to our public subnet, including a route to the IGW for internet traffic. With this setup, our Public_Subnet has a direct route to the internet.
4) Creating NAT gateway
A NAT gateway enables instances in a private subnet to initiate outbound connections to the internet, such as for essential operating system updates, while blocking any inbound connections from the internet to the private subnet.
Lets create our NAT gateway :
Select the NAT gateway from the left side menu and click on create NAT gateway.

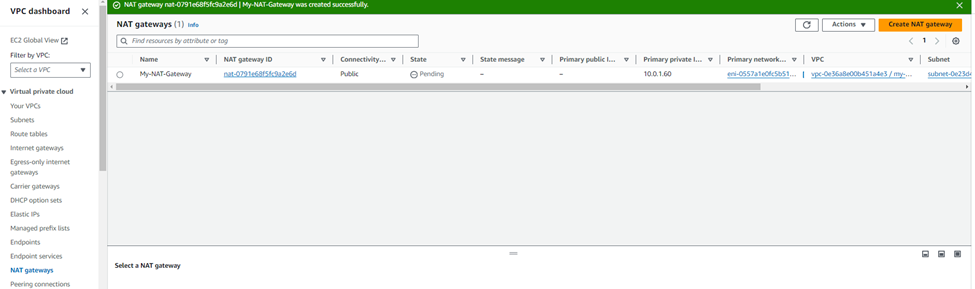
To configure the NAT gateway, we choosed Public_Subnet for the subnet and then click on Allocate Elastice IP to generate an Elastic IP Allocation ID. A NAT gateway uses Elastic IP (EIP) addresses for its addressing.
Then, click in Create a NAT Gateway. Here, we can see the NAT gateway was created.

Creating security groups in our subnets
Security groups provide virtual firewall level of protection at the instance level. Unlike subnets, security groups are linked to instances and manage traffic to and from those instances within your VPC.
Select security Group option from the left side menu and select Create Security group button.

Creating a security group for instances in Public_Subnet
This security group allows our own IP address inbound SSH connectivity as well as
allowing inbound HTTP traffic from the internet and all TCP communications from Private_Subnet.

We will leave the outbound rules as the default and select Create.
Creating a security group for instances in Private_Subnet
So, again create the security Group, but this time for the Private Subnet . For the first and second rules, we use the private IP address of your NAT gateway. And for the third rule, we used the security group ID of the Public_Security_Group as we already created.
We Leaved the outbound rules as the default and select Create.
This security group allows HTTP and HTTPS inbound from the NAT gateway. This will
allow any instances in the private subnet to be able to update their operating system (once a route has been provisioned). This security group also allows all TCP traffic from Public_Security_Group.

Now our security groups are configured, we can create our EC2 instances and associate
these security groups with our instances.
Creating EC2 instances in our subnets
Now, We can now create an EC2 instance in each of our subnets – both the public and private subnets – and associate the security groups that we just created.
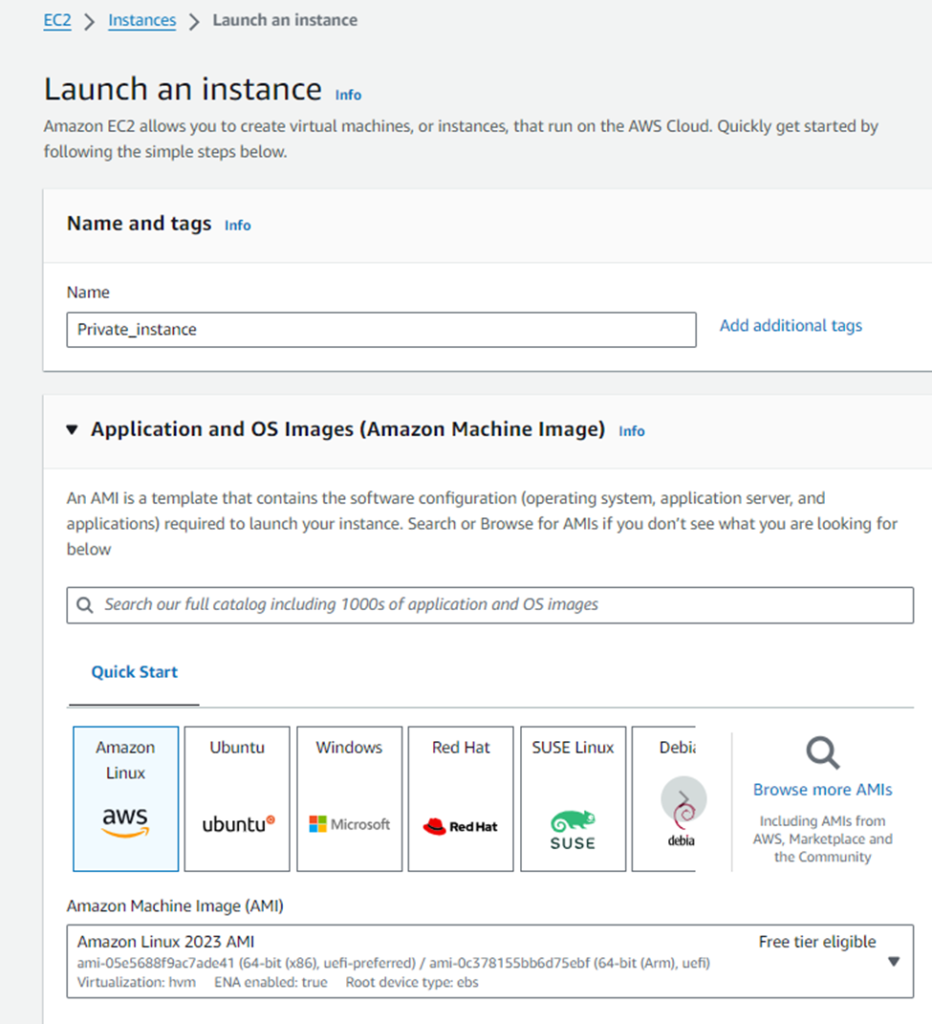
Creating E2C instances in Private_Subnet
Just go to the EC2 instances and do the following.
- Select an Amazon Linux AMI.
- 2. Create a t2.micro instance within your VPC and Private_Subnet.
- Add a tag of Name with a value of Private_Instance.
- Select the Private_Security_Group security group when prompted to select a security group.
- Accept all other defaults.
- Download a new key pair

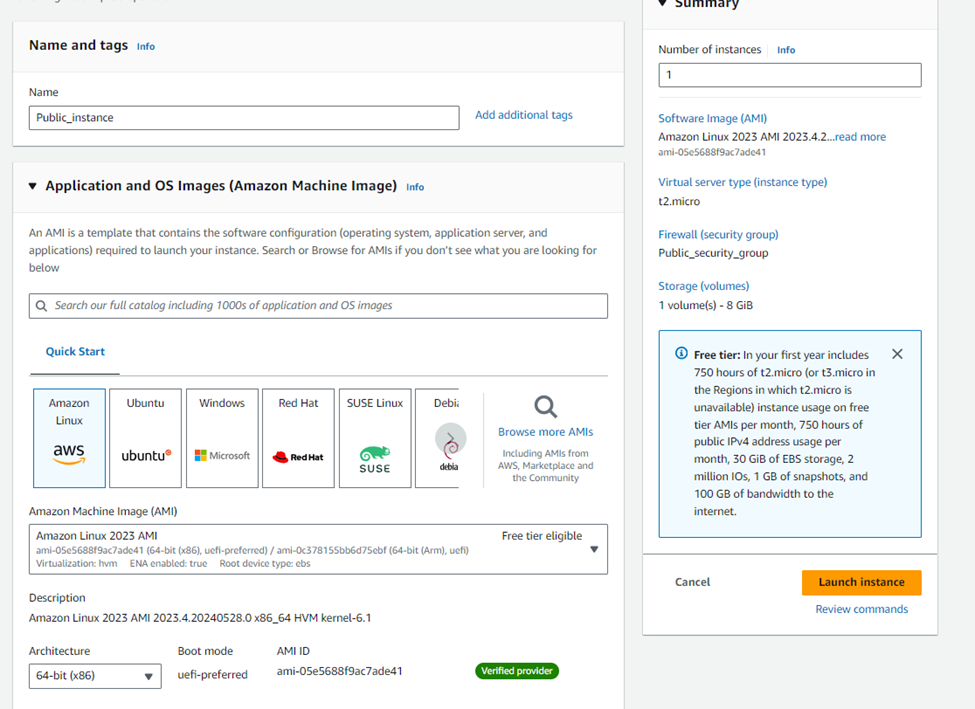
Creating E2C instances in Public_Subnet
We’ll now again follow the the same process for our public subnet.
To create E2C instances in the public subnet, follow these steps:
1. Select an Amazon Linux AMI.
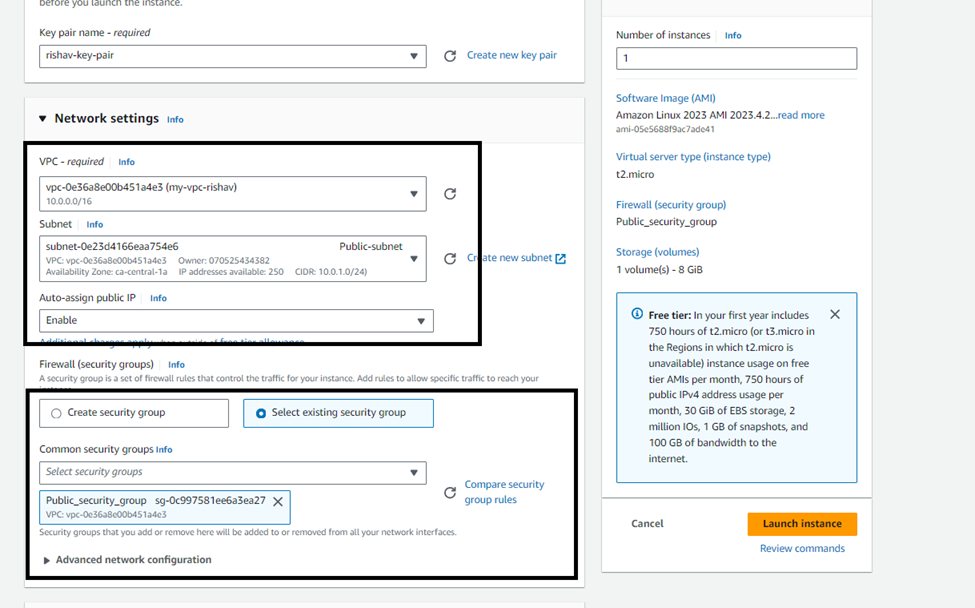
2. Create a t2.micro instance within your VPC and Public_Subnet.
3. Set the Auto-assign Public IP option as Enable.
4. Add a tag of Name with a value of Public_Instance.
5. Select the Public_Security_Group security group when prompted to select a
security group at step 6.
6. Accept all other defaults.
7. Download a new key pair.
With our EC2 instances created, our next step is to create a route table for our private
subnet.
Creating a route table for Private_Subnet
Here, We must now create our route table for the private subnet to ensure the private instance knows how to get to the internet via the NAT gateway.
Now we have to create the Private route table.

Add the configuration as shown in the Destination field of the second route and select our newly created NAT gateway(My-NAT-Gateway) as the target. This route sends all traffic without a known route to the NAT gateway, which will then send it out to the internet. Once done, click on Save routes:

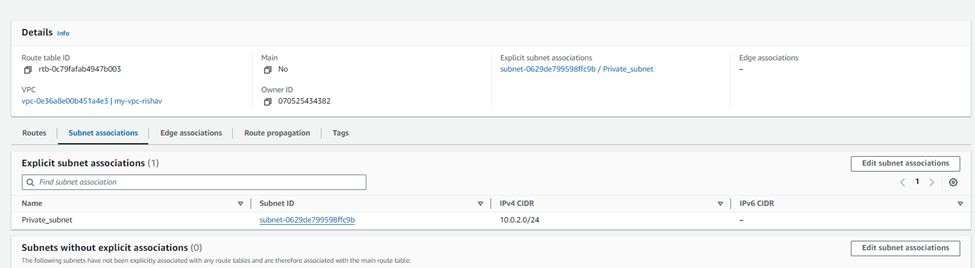
Now select Edit subnet associations. Select Private_Subnet and select Save.

Our infrastructure is now configured as shown:

As you can see, we have created our VPC, and the two subnets (public and private).
We have attached our IGW and created route tables for each subnet and added the appropriate routes to get to the IGW and the NAT gateway. We have also configured our security groups and associated them with our EC2 instances.
Finally, we will create a new NACL for each subnet as they are currently using the default NACL when the VPC was created, which allows all traffic through – this is not best practice.
Creating an NACL for our subnets
Using the default NACL of your VPC provides no security protection whatsoever. It allows all network traffic, both inbound and outbound. As a result, we need to create new NACLs and configure them to restrict only the network traffic we want to allow.
Creating an NACL for the public subnet
Now, Go to the VPC service and select Network ACL for the left menu and select create network ACL.


Click Create. By default, an explicit DENY will be added at the bottom of the NACL when you click Create, as shown here:

Select the Outbound Rules tab and configure the outbound rules as shown here. Once done, select Create:

Much like the route tables, we now need to associate this NACL with a subnet. Select the Subnet Associations tab | Edit subnet associations. Select Public_Subnet and click on Edit.

This NACL is now associated with your Public_Subnet rather than the default NACL that was created when the VPC was first created. This prevents any traffic from entering the public subnet that isn’t using either HTTP or HTTPS.
Creating an NACL for the private subnet
Same like above, now create NACL for the private subnet.
Select the newly created NACL from the list and it will display its configuration .
Select the Inbound Rules tab | Edit inbound rules and configure the NACL as shown in the following screenshot. Once done, click on Create:

Now go to the Outbound Rules tab and configure the outbound rules as shown in the following screenshot. Once done, select Create:

Now, just like we did for the public subnet, select the Subnet Associations tab | Edit subnet associations. Select Private_Subnet and click on Edit.

This NACL is now associated with your Private_Subnet. That is now all of the configuration required for this scenario, and as a result, your infrastructure will now look as follows:

The corresponding route tables can be seen as follows:

This is the final resource map.

This infrastructure allows the following:
- SSH connectivity from your own client to Public_Instance, through the use of Public_NACL and Public_Security_Group, allowing SSH from your IP address only, as well as the IGW and Public_Route_Table to allow outside connectivity to your VPC.
- Public_Instance can communicate with the internet, receiving HTTP traffic only as specified in Public_Security_Group, despite HTTPS being open on Public_NACL.
- Public_Instance can communicate with any instance within Private_Subnet using TCP, as detailed in the NACLs and security groups.
- Private_Instance can perform operating system updates using the NAT gateway with its associated Private_Route_Table and Private_Security_Group.
Now we have completed our VPC build with our networking components, we can be confident that we have applied a certain level of security to help protect our infrastructure. Our EC2 instances are protected by security groups with set protocols and ports. These instances are also isolated within their own subnets, which are protected by NACLs and their own route table, directing network traffic to where we want it to go, via the IGW or the NAT gateway. So, we have put effective measures in place to allow only certain traffic to be allowed to and from specific resources